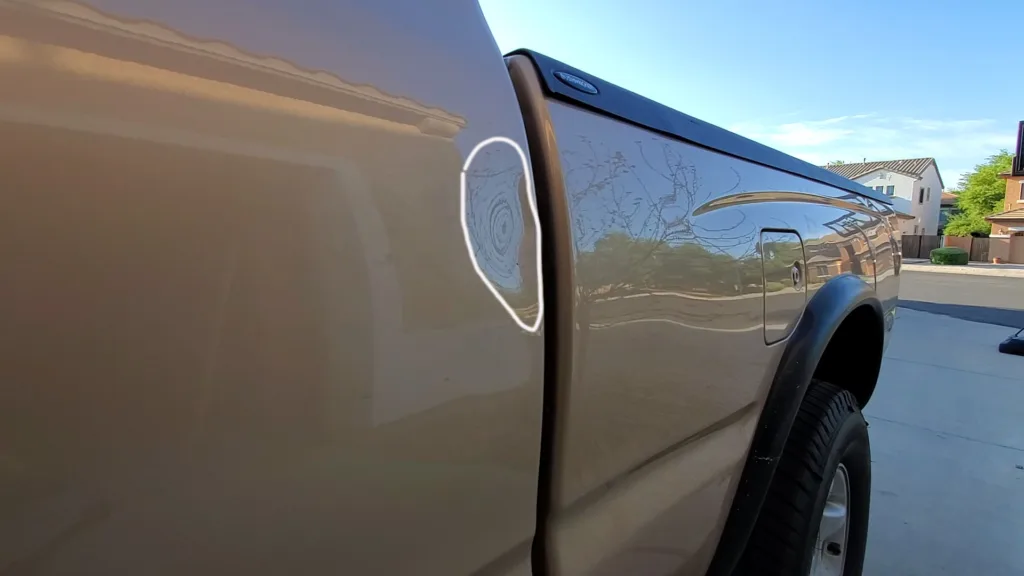
Got a baseball-sized dent on your truck? This article and video chronicle our first time using a popular and inexpensive car dent puller for effective paintless dent removal. Learn how to tackle this car repair yourself with our do-it-yourself guide to dent repair.
🛠️📦 Items Used:
PDR Dent Pulling Kit like the one in video but with more tabs – https://amzn.to/4q1VBfv
PDR Dent Pulling Kits (similar type) – https://amzn.to/4aEWaqV
Hairdryer – https://amzn.to/4iIl1fv
LED Light Panel for PDR – https://amzn.to/4iIl1fv
PDR accessories – https://amzn.to/4azPZV5
Isopropyl alcohol – https://amzn.to/3XKQdBh
Safety Gloves – https://amzn.to/489UG6E
🔧 What you’ll learn in this article and video:
How to use a dent puller
How to remove dentless without touching the paint
How to do Paintless Dent Removal
How to save money fixing a dent on your own
How to safely repair a dent for cheap
The article and video documents a first-time experience using a budget-friendly Paintless Dent Removal (PDR) dent puller kit from Harbor Freight (Pittsburgh Crossbar Dent Repair Kit) to repair a baseball-sized dent on a truck.
The inexpensive dent puller includes essential tools such as puller tabs, a hot glue gun with sticks, alcohol spray, a plastic scraper, and a knockdown tool. There and many similar style kits that share similar parts, though this particular one only includes two puller tabs, which was noted as a drawback.
For the repair itself, the process starts with these steps:
1. thorough cleaning of the dented surface using soap, water, and isopropyl alcohol to ensure it is spotless.
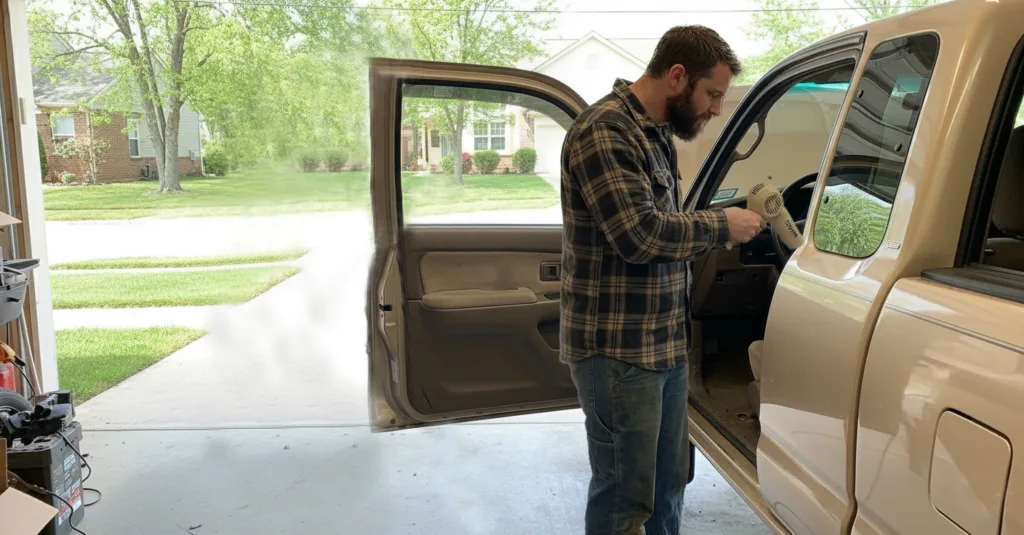
2. The next step involves warming the dent with a hairdryer when in cold weather to soften the metal, making it more pliable.
3. Once ready, the hot glue gun is heated, and glue is applied to the suitable-sized pull tab, which is then pressed onto the center of the dent. Allowing time for the glue to cool and bond properly with the metal is highlighted as crucial to ensure effective pulling.
4. After attaching the pull tab, the threaded screw mechanism on the dent puller is slowly twisted to pull the dent outward. This tension releases the dent in stages, popping the tab off eventually.
5. The dent is then inspected for improvement, and the process is repeated as necessary, using a smaller, more football-shaped tab as the dent reduces in size. You need to have patience; caution should be used to prevent premature pulling that can shift metal back and forth and reduce effectiveness.
6. Cleaning remaining glue from the vehicle surface is done with alcohol spray and a plastic scraper. The knockdown tool is mentioned as a finishing instrument to hammer down any excess raised areas if the dent puller pulls the surface outward too much.
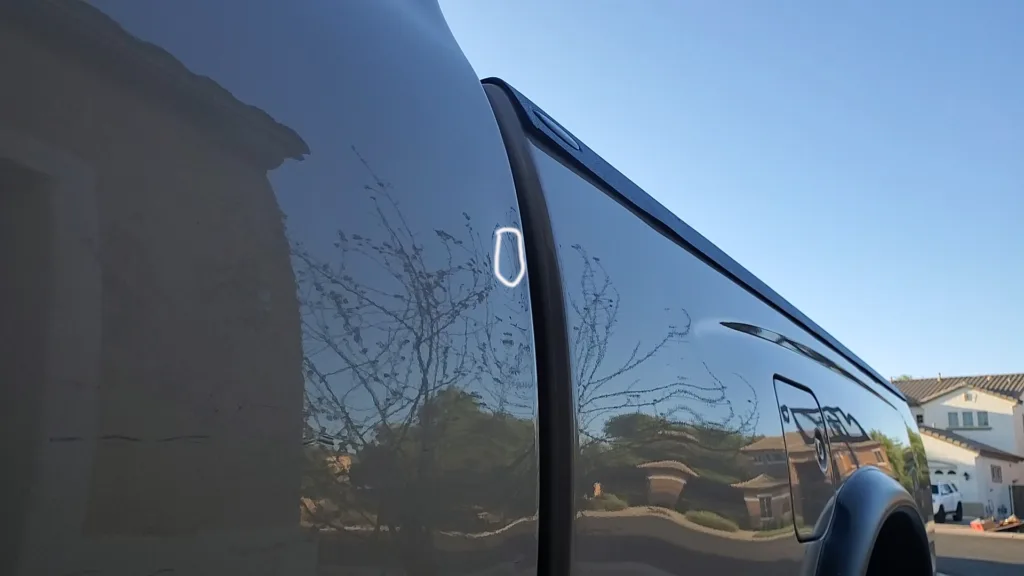
Overall, we were happy with the kit’s performance in reducing the size of the dent in just 15 minutes but we need to note the limitations of going smaller with the dent to due to the lack of tab size variety.
You can save money by fixing dents yourself, its fun and the learning experience of do-it-yourself dent repair is real. I personally plan to continue developing my PDR skills by offering free services to friends and family so I can improve my ability to do an even better job. If this article and video helped you, don’t forget to like, subscribe, and comment below with any questions. I’m happy to help troubleshoot!
Thanks for watching—and happy dent repairing!