Flushing a Rheem Performance Plus water heater and testing the pressure relief valve are important maintenance tasks to ensure the efficiency and safety of your water heater. Here are the instructions we used for both processes along with a video showing the process. This was for the Rheem Performance Plus gas water heater in particular but should apply to many different gas water heater models.
Flushing a Rheem Performance Plus Water Heater:
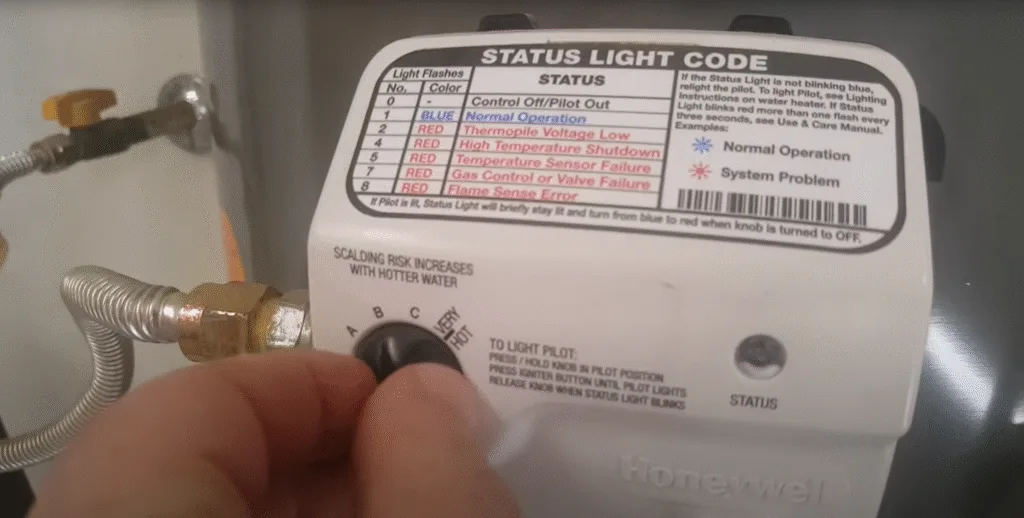
- Turn Off the Heater: Make sure the power source (gas or electricity) to the water heater is turned off. See image below or full video above.
- Allow Cooling: Give the water in the heater some time to cool down. Hot water can cause burns, so be cautious.
- Cold Water Supply: Turn off the cold water supply valve that feeds water into the heater.
- Attach a Hose: Connect a garden hose to the drain valve located at the bottom of the water heater. Position the other end of the hose near a suitable drainage area, like a floor drain or outside. Generally this should be lower in elevation than the bottom of the water heater. See image #2 below or video above.
- Open Drain Valve: Open the drain valve to allow water to flow out through the hose. Be cautious as the water may be hot. You can open the pressure relief valve at the top of the heater to speed up the draining process.
- Flush the Tank: Allow the water to flow until it runs clear. This will help remove sediment and mineral buildup from the tank. You might need to open and close the cold water supply valve a few times to help the flushing process.
- Close Valves: Close the drain valve and remove the hose.
- Turn On Water Supply: Turn on the cold water supply valve. This will help fill the tank while allowing any remaining sediment to be flushed out through the drain valve for a short time.
- Check for Leaks: Make sure there are no leaks around the drain valve or other connections.
- Restore Power: Turn the power supply (gas or electricity) back on to the water heater.
Testing the Rheem Performance Plus Pressure Relief Valve:
- Safety First: Before testing, make sure you’re familiar with the pressure relief valve location and have appropriate safety measures in place.
- Turn Off Heater: Turn off the power source to the water heater (gas or electricity).
- Locate the Valve: The pressure relief valve is usually located near the top of the heater and has a lever or a small handle. See image below.
- Open Valve: Lift the lever or handle on the pressure relief valve. Hot water and steam might discharge, so be cautious. In our case we put a bucket to catch the hot water.
- Release Pressure: Allow the valve to discharge water for a few seconds. This tests if the valve is functioning properly and can relieve excess pressure.
- Close Valve: Release the lever or handle to close the pressure relief valve.
- Check for Leaks: After closing the valve, check for any leaks around the valve itself.
- Restore Power: Turn the power supply (gas or electricity) back on to the water heater.
- Record date and time: Take a pen or marker and write on the tank when the flush and pressure relief valve was tested. This will serve as a recorded history log and can help remind you when you see it that it needs to be done again if it has been a while.
Remember that these instructions are general guidelines for the Rheem Performance Plus. It’s important to refer to your water heater’s manufacturer manual for specific instructions, as different models might have variations in the process. If you’re unsure about any step or encounter any issues, it’s a good idea to consult a professional plumber.